

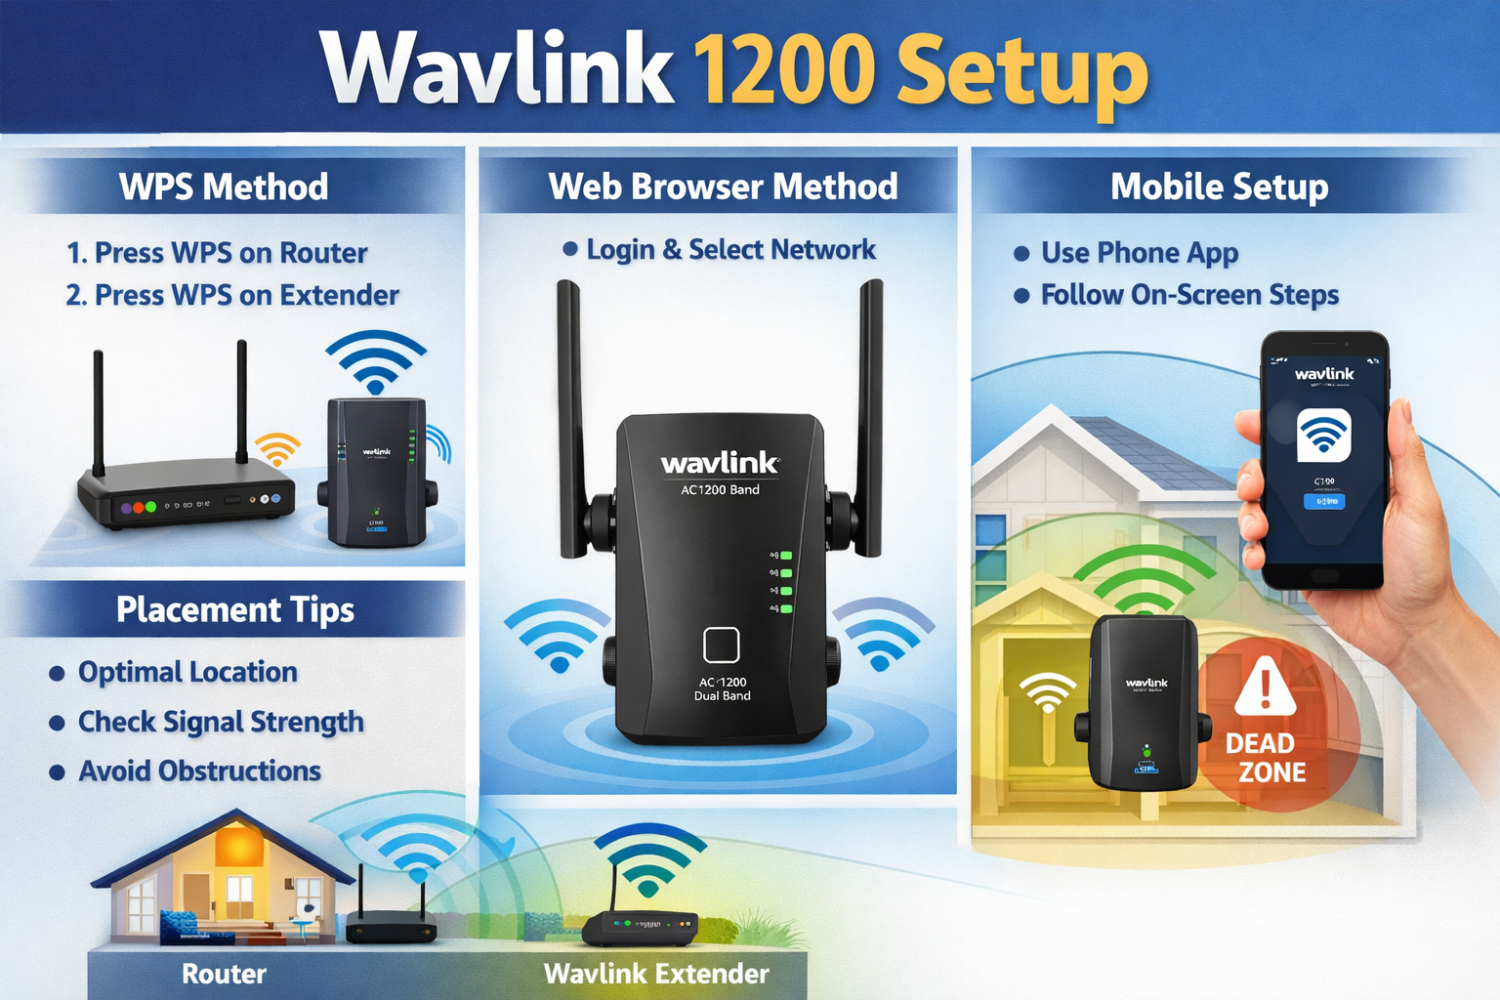
Setting up your Wavlink 1200 device is a simple process that helps extend and strengthen your existing WiFi network. The WAVLINK 1200 setup is a dual-band WiFi extender designed to eliminate dead zones and improve connectivity throughout your home or office.
To begin the Wavlink 1200 setup, plug the extender into a power outlet near your main router. Once powered on, connect your computer or smartphone to the device’s default WiFi network. Open a web browser and enter wifi.wavlink.com or 192.168.10.1 in the address bar to access the login page. Use the default login credentials to enter the setup dashboard.
From there, you can choose your preferred operating mode. In Repeater Mode, the device connects to your existing WiFi network and extends its coverage. Simply select your primary network from the list, enter the WiFi password, and complete the setup process. Alternatively, you can use the WPS button for a quicker connection by pressing the WPS button on both your router and the extender.
After configuration, move the extender to a location between your router and the area with weak signal for optimal performance. You can also customize network names, passwords, and update firmware for better security and stability.
With proper setup, the Wavlink 1200 ensures stronger, more reliable WiFi coverage throughout your space.