

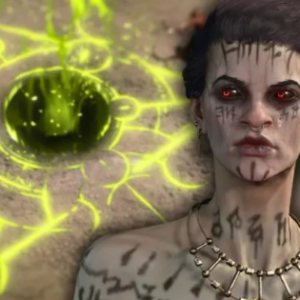

Once you have a decent chunk of time in Borderlands 4, you start to realise the game is not just about bigger guns, it is about how much nonsense you can stack on screen before your PC cries, and a lot of players quietly boost that with a bit of Borderlands 4 Cash for testing new setups. The wild part is how strong the Whip feels once you stop treating it like a panic melee and build fully around it. The damage on the swing is whatever; the real value is the pull. With the Velocitous Bind passive turned on, every snap yanks weaker mobs into a tight little ball, so instead of five guys sprinting at you from random angles, you get one neat pile begging to be deleted.
Locking Down The Mob
The whole plan lives or dies on that crowd control. You are not spamming the Whip for style points, you are using it like a fishing hook. Tag a trash mob at the edge, watch the pull drag the rest in, then you get a short window where everything is stumbling around and not shooting back. If you swing too early or cancel the animation, the group spreads out again and your big skills feel weak. Take a bit of time in a low level zone, practice the distance where the pull always connects, and you will notice that even bruiser types get dragged just enough to sit in the blast zone.
Ordinance Timing And Stats That Matter
Once you are grouping enemies properly, the Ordinance side of the build starts to look broken. You want gear that stacks Splash Damage and Area of Effect (AoE) rather than flat gun damage, and this is where people mess up, chasing shiny legendaries instead of checking parts. A purple launcher with big radius and slow fire rate is perfect, because you are lining up one huge shot, not spraying. As soon as the Whip lands and the pull animation kicks in, fire the Ordinance so it hits at the peak of the stun. Stunned enemies eat bonus damage, and when that multiplies with splash, you see whole health bars disappear from one click.
Gear Pieces That Quietly Carry
For grenades, the Cluster prefix is the one you want. The main explosion can whiff a little and still be fine, because the bomblets bounce around and wipe whatever is left standing in the pack. It feels silly when a single throw clears a room that used to take half a mag. Do not ignore your shield either. An Amp shield fits this playstyle really well, since you are starting fights with a clean bar. That first Ordinance shot gets the amp bonus across the whole explosion, so one blast will chunk badass enemies in a way that makes other builds feel slow.
Staying Alive In Your Own Chaos
The only real downside is how often you can blow yourself up if you get greedy. You are playing close to make the Whip land, which means you are also standing way too near your own blasts. Picking up skills like Blast Padding, or any damage reduction tied to explosions, makes a huge difference, and it is worth giving up a bit of raw DPS to avoid going down every third fight. The rhythm you are aiming for is simple but takes a bit to stick in your muscle memory: step in, snap, quick hop or slide back, then fire. Once that clicks, you will be shredding bosses, popping mobs like balloons, and wondering why anyone is still running boring gun builds when this much fun is basically sitting there waiting, especially once you have your favourite setup locked in and backed by a stash of Borderlands 4 Items buy to test different rolls.