You finally got that new Pfaff machine. The touchscreen is bright, the features are impressive, and you are ready to turn your logo designs into beautiful embroidery. Then you hit the first wall. You load your logo file onto a USB stick, plug it into the machine, and get an error message. The machine does not recognize the file. Before you start blaming the machine, know this: your Pfaff is not being difficult. It just speaks a different language. To get those needles moving, you need to learn how to convert logos for Pfaff embroidery machines correctly.
Pfaff machines require specific file formats like VP3, PCS, and VIP that contain detailed stitch instructions . A standard JPG or PNG only shows what the design looks like. It does not tell the machine where to put the needle, how dense the stitches should be, or when to change colors. This guide walks you through everything you need to know to convert and optimize your logos for flawless production on your Pfaff.
Understanding Pfaff File Formats
Before you convert anything, you need to understand what your machine actually needs. Pfaff embroidery machines use several native formats depending on the model and age .
PCS is an older format used primarily by Pfaff and some older Husqvarna Viking machines . It contains basic stitch coordinates, color sequences, and trim commands. While it works, it offers limited functionality compared to newer formats.
VP3 represents a significant upgrade. This format stores detailed metadata including thread colors, stitch density, underlay settings, and color sequence information . VP3 supports advanced editing and is ideal for larger, multi-layer designs. If you own a Creative series machine like the 2124 or 2144, VP3 is your best friend .
VIP is an even older legacy format used in machines like the Creative 4.5 . It contains basic stitch data but limited editing capabilities. You might still encounter VIP files when working with older designs.
VP4 is the newest format designed for top-tier models like the Icon series . It includes additional editing data and full compatibility with modern software.
For production work on modern Pfaff machines, VP3 is typically your best choice because it preserves color information and allows for future edits .
Why Logo Conversion Matters
You might wonder why you cannot just use a standard image file. Here is the simple truth. Embroidery machines are robots that need precise instructions. A JPG or PNG only contains pixel information. It shows what the design looks like on a screen but provides zero guidance on how to stitch it .
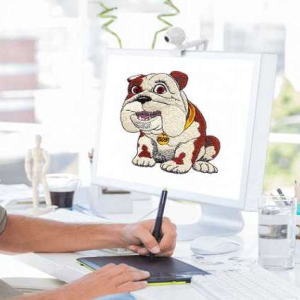
Proper logo conversion, also called digitizing, translates your artwork into stitch commands. A professional digitizer assigns stitch types, sets density, adds underlay, plans stitch direction, and sequences color changes . Without this step, your machine either rejects the file or produces a distorted, thread-tangled mess.
Business logos deserve this attention to detail. When you stitch your brand onto uniforms, caps, or promotional items, that logo represents your company. Poor embroidery makes your brand look cheap and unprofessional . Proper conversion ensures clean edges, accurate colors, and consistent results every time.
Methods to Convert Logos for Pfaff Machines
You have several options for converting your logos. Each comes with trade-offs in cost, time, and quality.
Option 1: Professional Digitizing Software
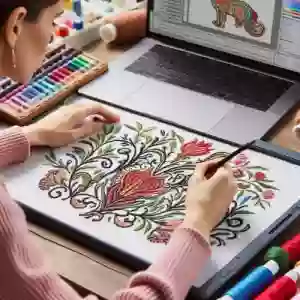
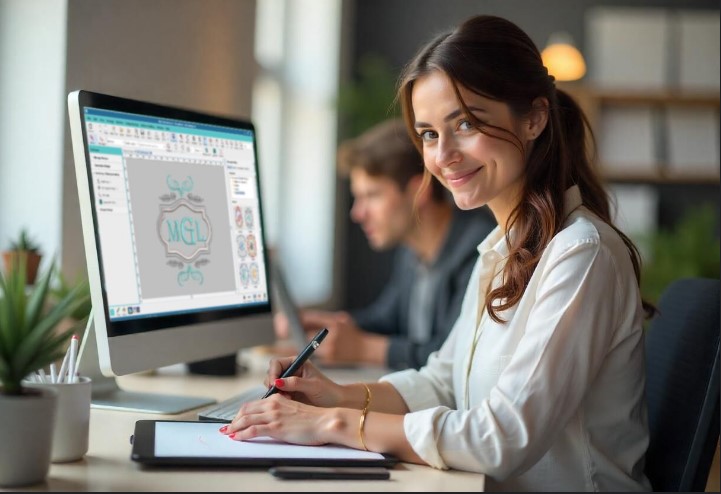
If you plan to digitize frequently and have time to learn, professional software gives you complete control. Programs like Wilcom Embroidery Studio, Hatch, and mySewnet allow you to import artwork and manually create stitch files .
The process involves importing your logo, assigning stitch types to different elements, setting density and underlay, and exporting in Pfaff-compatible formats like VP3 or PCS. You can fine-tune every detail to match your specific fabric and placement requirements.
The downside is significant. Professional software costs hundreds or even thousands of dollars. The learning curve is steep, requiring weeks or months to master. For occasional logo conversions, this investment rarely makes sense .
Option 2: Auto-Digitizing Tools
Many software programs include auto-digitizing features that convert images to stitches with a few clicks. This sounds tempting, and for very simple designs like basic shapes or text, it might work okay.
But auto-digitizing fails consistently on complex logos. The software randomly assigns stitches without understanding texture, fabric behavior, or design intent . Results often include jagged outlines, incorrect density, missing underlay, and poor scaling. You end up with thread breaks, puckered fabric, and logos that look nothing like your original .
Auto-digitizing works for hobby experiments but rarely for production-quality work.
Option 3: Free Online Converters
Free online converters are everywhere. You upload your image, click convert, and download a file. The process takes minutes. The results are almost always disappointing .
These tools distort stitch density, strip out fine details, and ignore color information. They cannot handle complex logos or gradients. The files they produce often cause machine jams, skipped stitches, or outright rejection . You might save money upfront, but you waste thread, fabric, and hours of frustration trying to fix bad files.
Option 4: Professional Digitizing Services (Recommended)
For most businesses and serious hobbyists, professional digitizing services deliver the best results with the least hassle. Experienced digitizers manually create stitch files optimized for Pfaff machines .
These experts understand stitch flow, underlay, density, pull compensation, and fabric behavior. They test files in simulation software before delivery, ensuring clean results. Services like Absolute Digitizing and Digitizing Buddy offer fast turnaround, often same-day or within hours, with prices starting around $10 per design .
You get unlimited free edits until satisfied, guaranteed compatibility, and production-ready files without buying expensive software or climbing a steep learning curve. For consistent, professional results, this is the smartest investment.
Step-by-Step Logo Conversion Process
Let us walk through how professionals actually convert a logo for Pfaff machines .
Step 1: Receive and Prepare Artwork
The process starts with your logo file. High-resolution vector files like AI, EPS, or SVG work best because they scale perfectly and maintain clean edges . JPG or PNG files can work but should be sharp with good contrast. The digitizer reviews the artwork to understand shapes, colors, and complexity.
Step 2: Import into Professional Software
Using advanced programs like Wilcom Embroidery Studio, the digitizer imports your artwork. This software provides complete control over every stitch parameter .
Step 3: Manual Stitch Mapping
This is where art meets engineering. The digitizer manually assigns stitch types to each element of your logo .
-
Satin stitches for borders, text, and thin elements
-
Fill stitches for larger areas and backgrounds
-
Running stitches for fine details and underlay
Step 4: Adjust Density and Add Underlay
Stitch density controls how close stitches sit together. Too dense causes puckering and thread breaks. Too loose lets backing show through. The digitizer sets density based on your fabric type .
Underlay stitches go down first, stabilizing the fabric and preventing shifting . This hidden foundation makes the difference between professional and amateur results.
Step 5: Set Stitch Direction and Pull Compensation
Stitch direction affects how light reflects off the finished embroidery. The digitizer plans direction to follow the natural flow of your design .
Pull compensation accounts for fabric distortion during stitching. The digitizer widens certain areas so they end up the correct size after stitching.
Step 6: Assign Thread Colors
The digitizer matches thread colors to your brand specifications using standard thread charts. This ensures consistency across production runs .
Step 7: Save in Pfaff-Compatible Format
The finished design exports in VP3, PCS, or VIP format depending on your machine requirements. VP3 is preferred for modern machines as it preserves color data .
Step 8: Quality Testing
Before delivery, the file runs through embroidery simulation software to catch any flaws. The digitizer checks for gaps, misalignment, or density issues .
Step 9: Delivery and Edits
You receive the final file and test it on your machine. If any adjustments are needed, professional services offer free unlimited edits until you are completely satisfied .
Optimizing Your Designs for Production
Converting the file is only half the battle. To maximize your Pfaff machine's performance, you need to optimize how you run those designs.
Fabric Preparation Matters
Different fabrics require different preparation. For thin, delicate fabrics like silk or organza, place the fabric between two layers of water-soluble stabilizer before hooping . This prevents distortion and keeps everything stable during stitching.
For stretchy knits like jersey, use adhesive-backed paper in the hoop. Stick the fabric to the paper following the grain direction, ensuring it does not shift . Add water-soluble stabilizer on top and use a jersey needle for best results.
Stabilizer Selection
Your choice of stabilizer affects stitch quality. Cut-away stabilizer works for dense designs and stretchy fabrics. Tear-away works for stable wovens. Water-soluble works for fabrics where you want no stabilizer showing in the final product.
When in doubt, use a heavier stabilizer than you think you need. It is better to have too much support than too little.
Hooping Techniques
Proper hooping prevents shifting and misalignment. For standard hoops, ensure the fabric is taut but not stretched. The grain should run straight .
Magnetic hoops like MaggieFrame offer advantages for production work. Strong magnets hold fabric securely without manual screw tightening, reducing slippage and saving time . They work especially well for thick fabrics and garments where traditional hoops struggle.
For large designs requiring multiple hoopings, use Pfaff's Exact Positioning system to align sections precisely. The Endless Hoop function lets you stitch continuous borders and edge-to-edge designs with minimal repositioning .
Needle Selection
Match your needle to your fabric. Use a 75/11 needle for general fabrics, 80/12 for denser materials, and jersey needles for knits. Change needles regularly, ideally after every major project or eight hours of stitching. Dull needles cause skipped stitches and thread breaks.
Tension Adjustment
Even perfect files stitch badly with incorrect tension. Test on scrap fabric first and adjust as needed. For thick materials like denim, use lower tension settings to prevent puckering . For standard 40-weight thread, moderate tension usually works.
Common Problems and Solutions
Even with proper conversion, issues can arise. Here is how to fix them.
Thread breaks often trace back to density that is too high or tension that is too tight. Check your file settings and adjust tension in small increments.
Fabric puckering usually means insufficient stabilizer, density too high, or tension issues. Add stabilizer, reduce density, or loosen tension.
Misaligned design elements point to missing underlay or poor hooping. Add underlay in your file or re-hoop with better tension.
Machine not reading files typically means wrong format or USB issues. Format your USB drive as FAT32, keep file names simple, and ensure you saved in VP3, PCS, or VIP format .
When to Outsource vs. DIY
Deciding whether to convert logos yourself or hire professionals depends on your situation.
If you are a hobbyist making occasional projects and enjoy learning new skills, investing time in software like Embrilliance or Ink/Stitch can be rewarding . You gain control and understanding of the digitizing process.
If you run a business with client deadlines and quality expectations, outsourcing makes more sense. Professional services deliver consistent results without the learning curve or software costs . At $10-15 per design, the investment pays for itself in saved time and avoided mistakes.
Conclusion
Converting logos for Pfaff embroidery machines is not a simple file save. It is a skilled process that transforms artwork into precise stitch instructions. Understanding formats like VP3, PCS, and VIP helps you choose the right file for your machine.
You can learn digitizing yourself with software like Wilcom or Embrilliance, but expect a significant time investment. Auto-digitizing and free converters tempt with convenience but deliver poor results that waste materials and time.
For production work where quality matters, professional digitizing services offer the best combination of quality, speed, and value. Experienced digitizers handle stitch types, density, underlay, and compensation so your logos stitch cleanly every time.
Whichever path you choose, remember that proper file conversion is just the start. Good fabric preparation, stabilizer selection, hooping technique, and machine maintenance all contribute to flawless embroidery. Master these elements, and your Pfaff machine will produce stunning logos that represent your brand with pride.